Okay, so today I wanted to try making a tennis bracelet. I’ve seen these around and they look pretty, so I figured, why not give it a shot? First off, I gathered all the stuff I needed. This included a bunch of those shiny cubic zirconia stones – I went with the 3mm ones because they seemed like a good size. Then, of course, I needed the chain to put them on. I picked up some silver-plated chain that looked sturdy enough.

Getting Started
I started by laying out the chain on a flat surface. This helped me figure out how long I wanted the bracelet to be. I wrapped it around my wrist a few times, you know, just to get a feel for it. Once I was happy with the length, I snipped the chain with some wire cutters. Easy peasy.
Attaching the Stones
- Next came the slightly trickier part – attaching the stones.
- Each of those little stones had these tiny prongs on the setting.
- I had to carefully place each stone onto the chain link and then use some small pliers to bend those prongs over, securing the stone in place.
It was a bit fiddly, to be honest. My fingers felt huge, and those stones were so small! But I took my time, one stone at a time. I found that using a pair of tweezers helped a lot in positioning the stones just right.
The Tedious Process
Let me tell you, this part took a while. It was repetitive work, and after a while, my eyes started to feel a bit strained. But I kept at it. I put on some music and just focused on getting each stone on there nice and snug.
Finishing Touches
Once all the stones were attached, I added a clasp to each end of the chain. I used jump rings for this, just opened them up with pliers, hooked them onto the chain ends and the clasp, and then closed them back up. A bit of a squeeze with the pliers ensured they were secure.
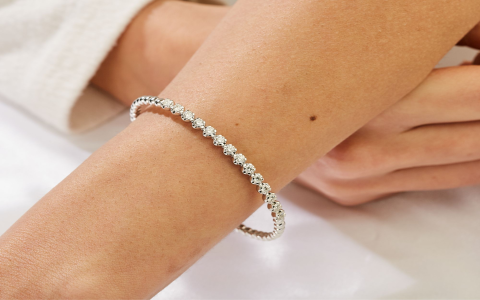
My Finished Tennis Bracelet
Finally, after all that work, I had my very own handmade tennis bracelet! It turned out pretty good, if I do say so myself. It’s sparkly and catches the light just like I wanted it to. It was a bit of a learning curve, especially with those tiny stones and prongs, but totally worth it in the end. I’m already thinking about making another one, maybe with different colored stones next time. It’s a fun little project, and you get a nice piece of jewelry out of it. Give it a try if you’re into making things with your hands! You might surprise yourself.